02 May 2020
- Vehicle: 2012 Mazda 3i, 2.0L, vin G
- Tools Used:
- Car jack
- Jack stands
- Wheel chocks
- 1/2” drive socket wrench
- 1/2” drive torque wrench (for tightening wheel lugs)
- 21mm socket (for wheel lugs and turning the crankshaft)
- 3/8” drive socket wrench
- 14mm socket (for tensioner pulley)
- Phillips screwdriver (for splash guard)
- 10mm box wrench (for splash guard)
- Scissors (a pocket knife will work too)
- 8” zip ties
- Parts Purchased:
My Mazda had over 100k miles under its belt. Ba-dum, chshhsh. Despite a crack-free belt inspection, I decided to do a little preventative maintenance and replace the serpentine and a/c drive belts. And since the tensioner pulley had a few millimeters of play, it had to go too.
Layman’s Intro to Drive Belts
The prime objective of the internal combustion engine is to convert downward motion of the pistons (caused by explosions of air, fuel and spark) into rotational motion of the crankshaft. Drive belts (often alluded to as fan belts by old timers) are all connected to a crankshaft pulley. Their purpose is to help rotate other components. The serpentine belt is a type of drive belt that rotates multiple components like the alternator (providing your car with electric power and recharging your battery), water pump (which pumps coolant through the radiator and engine), a/c compressor, etc. Its winding disposition gives it its name. A special pulley known as the tensioner pulley keeps the belt tight, even as the belt stretches over time.
Procedure
-
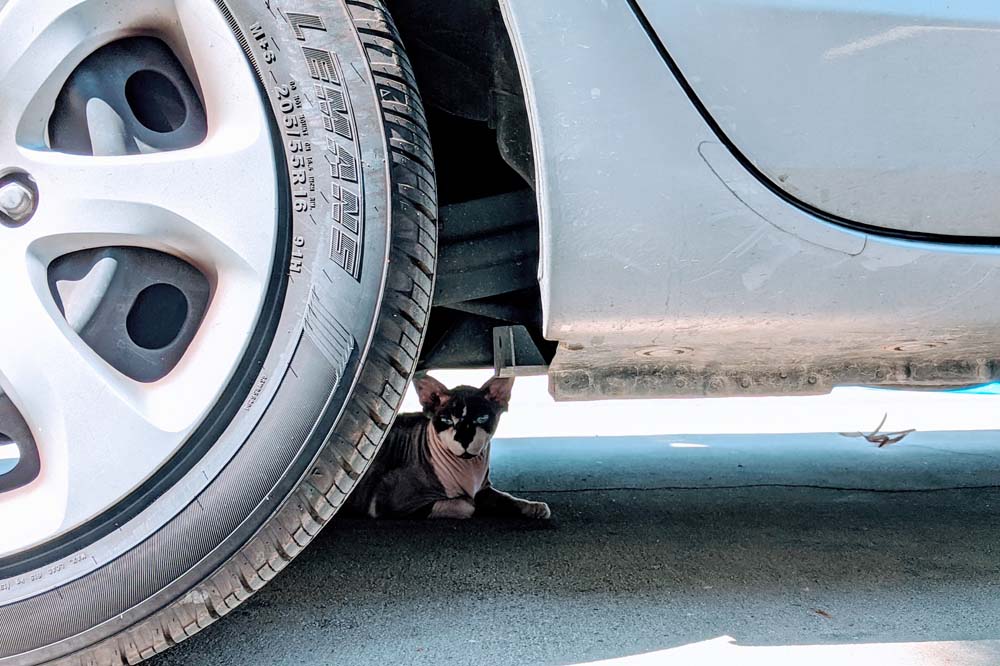
Use a treat to lure any beloved beings away from the vehicle. Boba works on me.
-
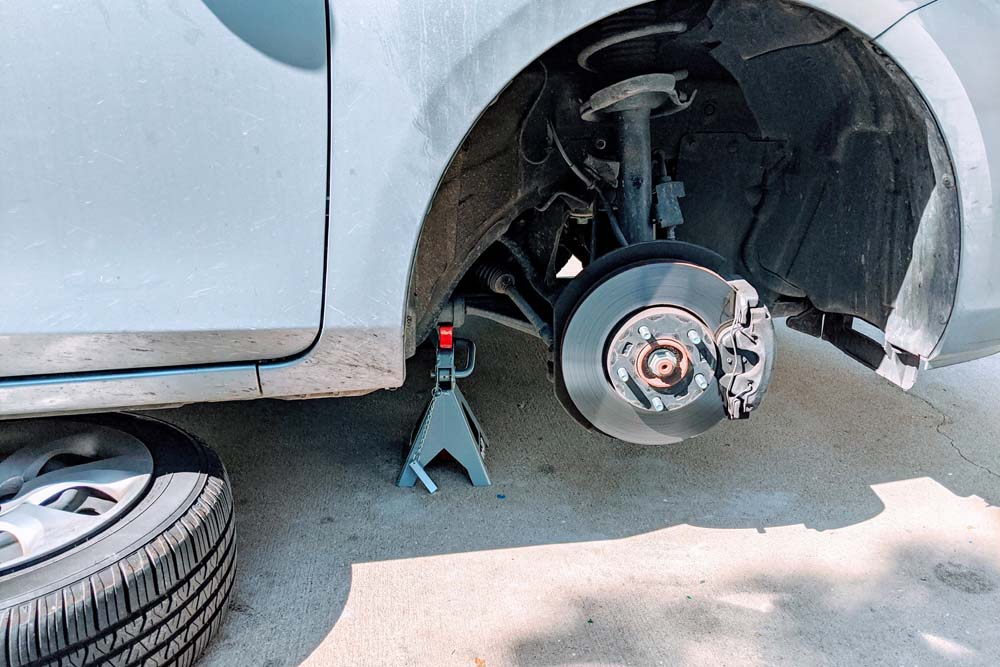
Raise the front of the vehicle onto jack stands. Don’t forget to first engage the e-brake and use wheel chocks on the rear tires. Remove the front right wheel and use it as a backup for the jack stands.
-
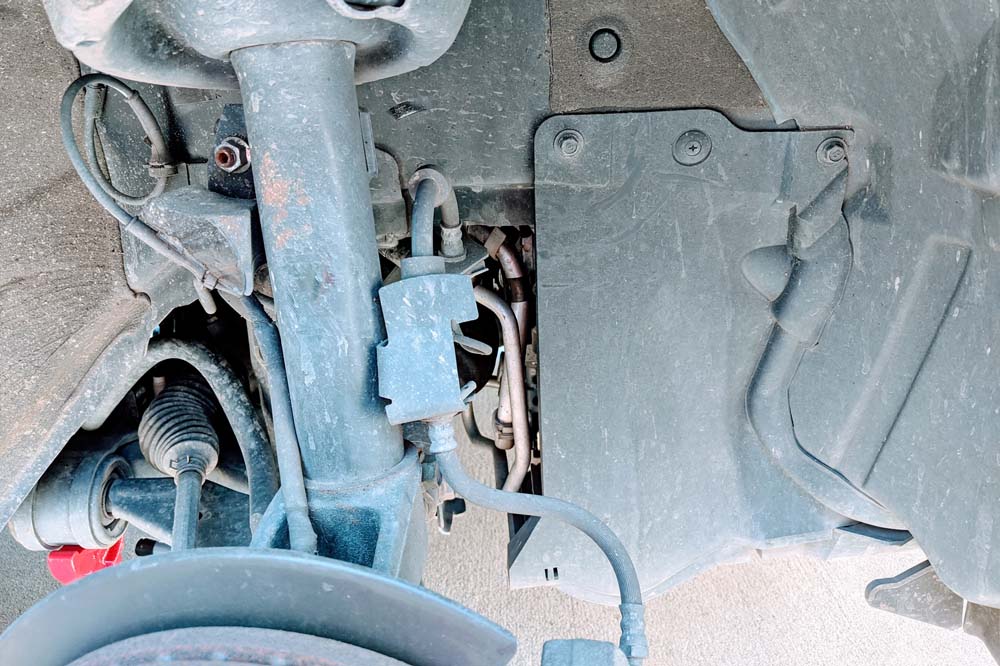
Remove the splash guard as seen on the right of the photo. This is fastened on top by two 10mm bolts and a screw as shown. The bottom is held in with two 10mm bolts.
-
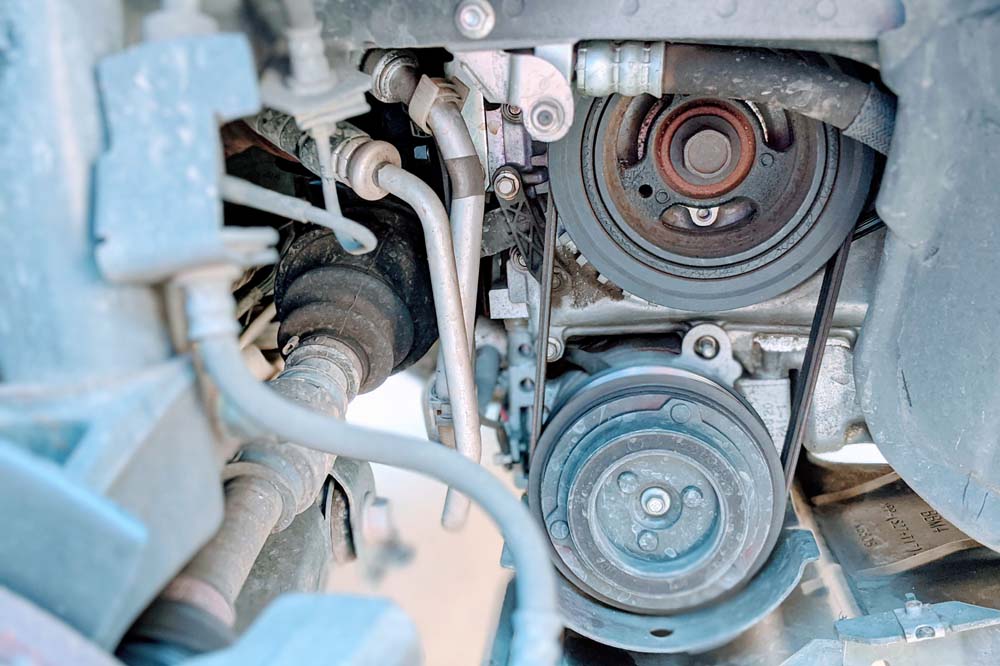
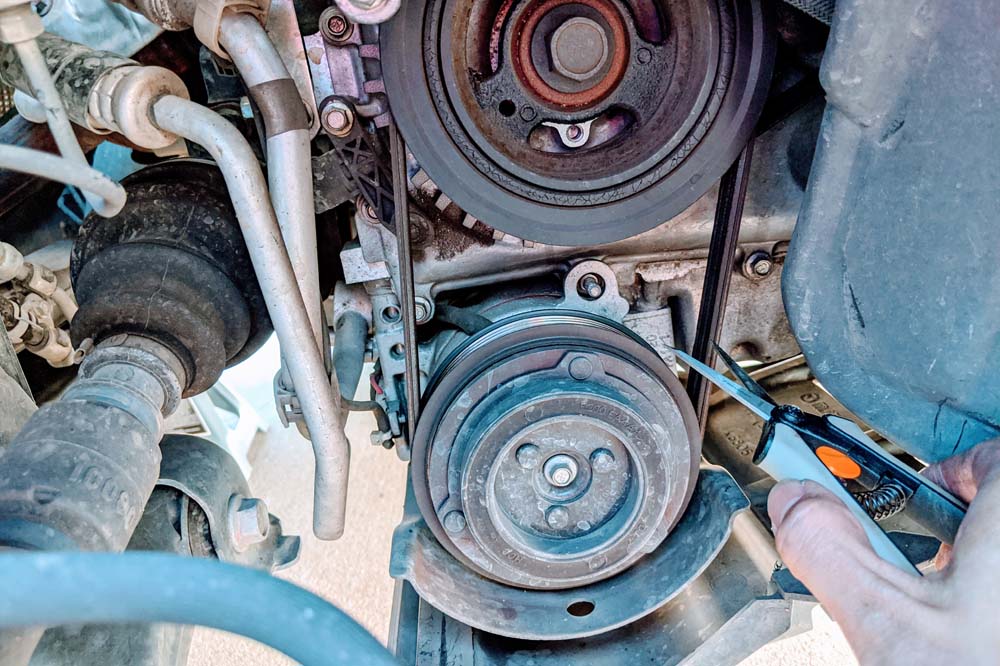
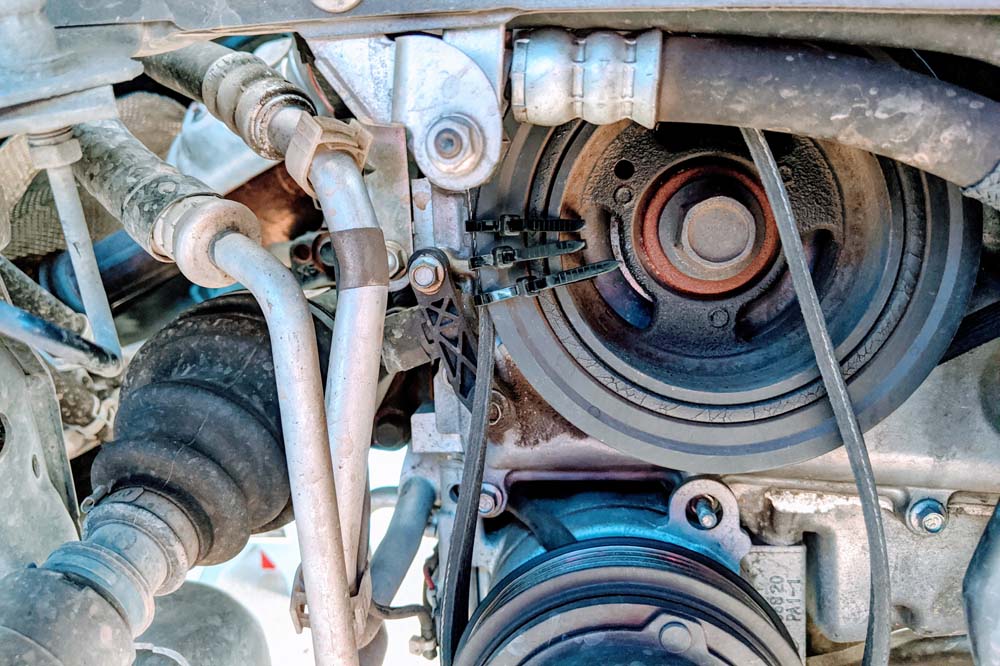
Removing the splash guard exposes the crankshaft pulley (top), a/c compressor pulley (bottom) and a/c drive belt. The a/c drive belt has no tensioner - it’s a stretch belt and a pain in the ass to install. The serpentine belt, more accessible from the engine bay, rides on a separate set of ribs on the crankshaft pulley behind the a/c belt. You cannot replace the serpentine belt without first removing the a/c stretch belt.
-
The only way to reasonably remove the a/c stretch belt is to slice it. If you quit after this, you can still drive around without air conditioning. You might even get better mileage without the friction of a second drive belt. What you won’t be getting is an erect set of nipples despite the scorching summer heat.
-
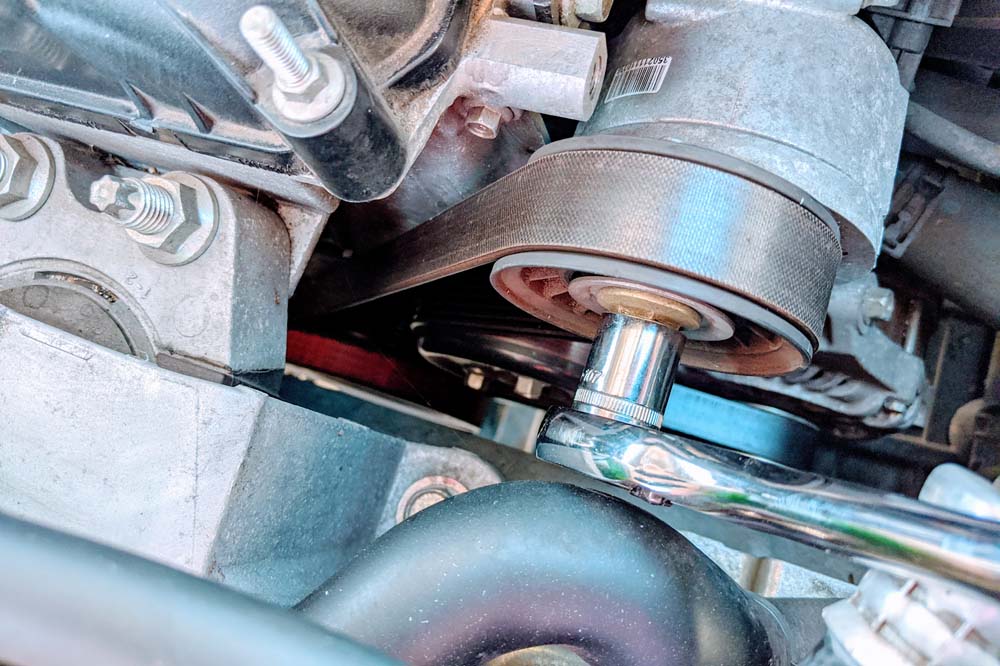
Up in the engine bay, take a mental snapshot of how the belt wraps around the different pulleys before removing it. In the photo from the bottom left, the belt comes from the crankshaft pulley up to the tensioner pulley, back down and left to the shiny water pump pulley, down and right to the alternator pulley, and finally back to the crankshaft pulley.
-
Use a socket wrench with 14mm socket to push (towards the rear of the vehicle) and loosen the tensioner pulley so you can remove the serpentine belt.
-
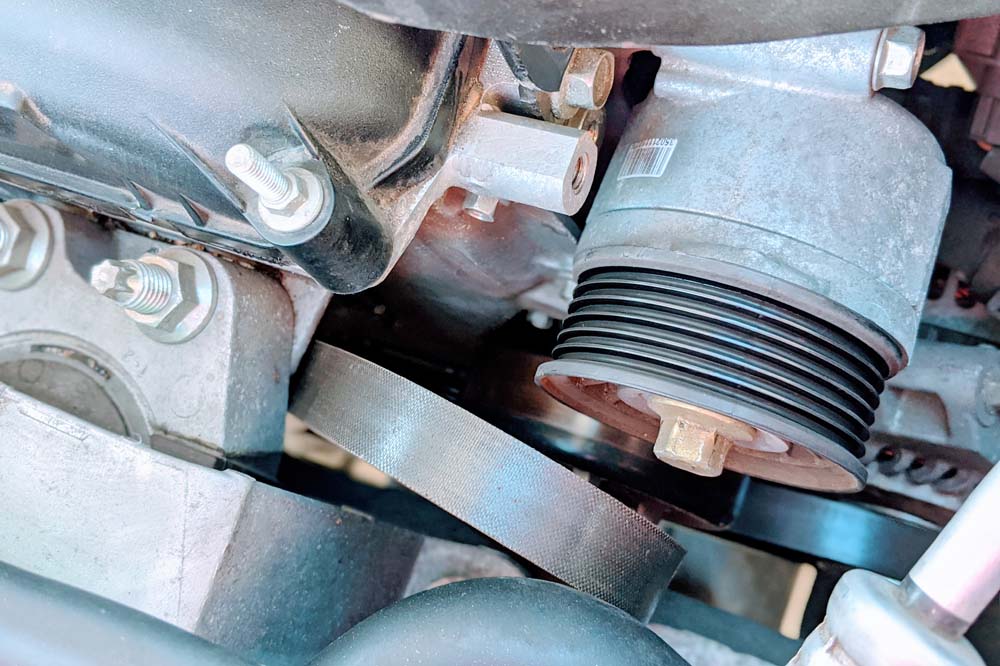
Before installing the new serpentine belt, replace the tensioner pulley. It’s important to know that the bolt for this pulley loosens clockwise and tightens counter-clockwise. Unscrew the bolt and washer and install the new pulley.
-
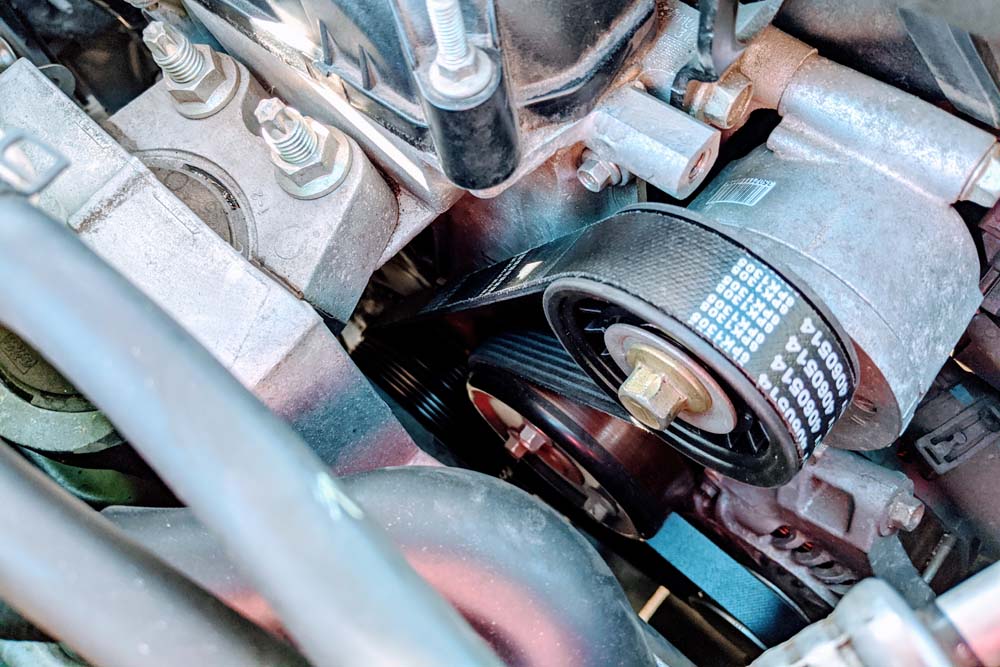
Install the new serpentine belt, and take care to seat the ribs properly. I found it easiest to fit the belt over the tensioner pulley last.
-
If you’ve made it this far, know that the hardest part lies ahead. Mazda makes a special tool to install the a/c stretch belt, but the consensus is that using a simple zip tie hack is far easier than using the tool itself. Wrap the belt around the a/c compressor, and zip tie the top left to the crankshaft pulley as shown.
-
Now, use a socket wrench with 21mm socket to rotate the crankshaft clockwise from the crankshaft bolt at the center of the pulley. For some engines, you shouldn’t rotate the crankshaft opposite of its operating direction, so we’ll just adhere to that principle here. While rotating, guide the belt towards proper seating. The zip ties may pop and break, and that is completely normal. If all of them break before the belt is seated, you’ll have to start over. Once you get the a/c belt on, remove the zip ties, and give the crankshaft a couple more rotations to ensure the belt is installed properly.
-
Start your car and make sure it doesn’t explode.
Results
Everything felt the same, and the air conditioning still works. This is good. However, my gas mileage went down by roughly two miles per gallon. I wonder if the new stretch belt is adding a lot more friction to the crankshaft. Perhaps it just needs time to stretch out a bit. Time will tell.
25 Apr 2020
- Vehicle: 2012 Mazda 3i, 2.0L, vin G
- Tools Used: 10mm box wrench
The hand break was practically pointing to the sky before engaging, so it was time to tighten this sucker.
Procedure
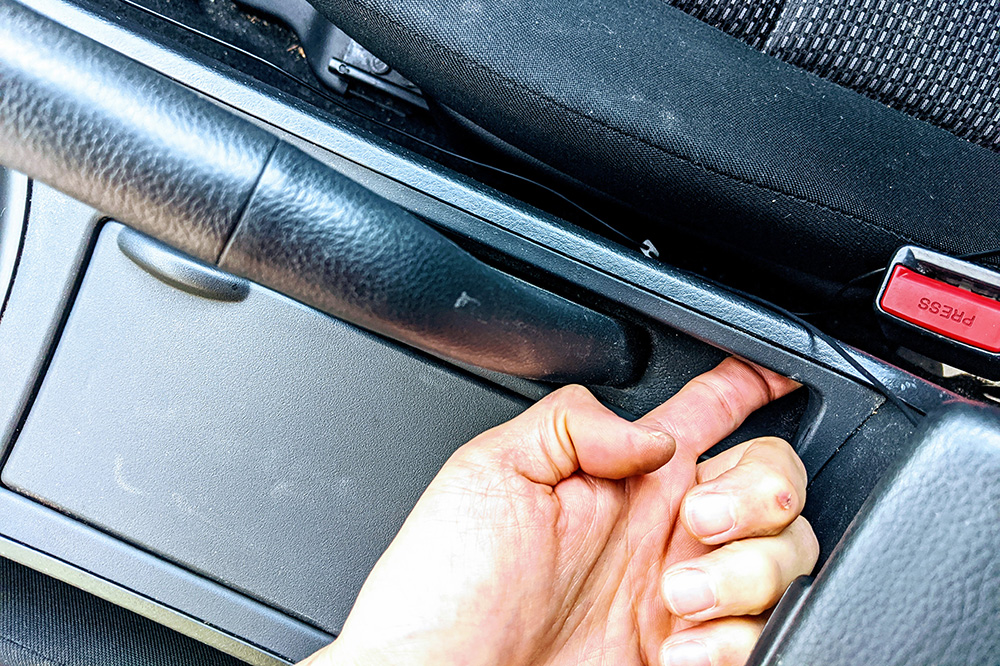
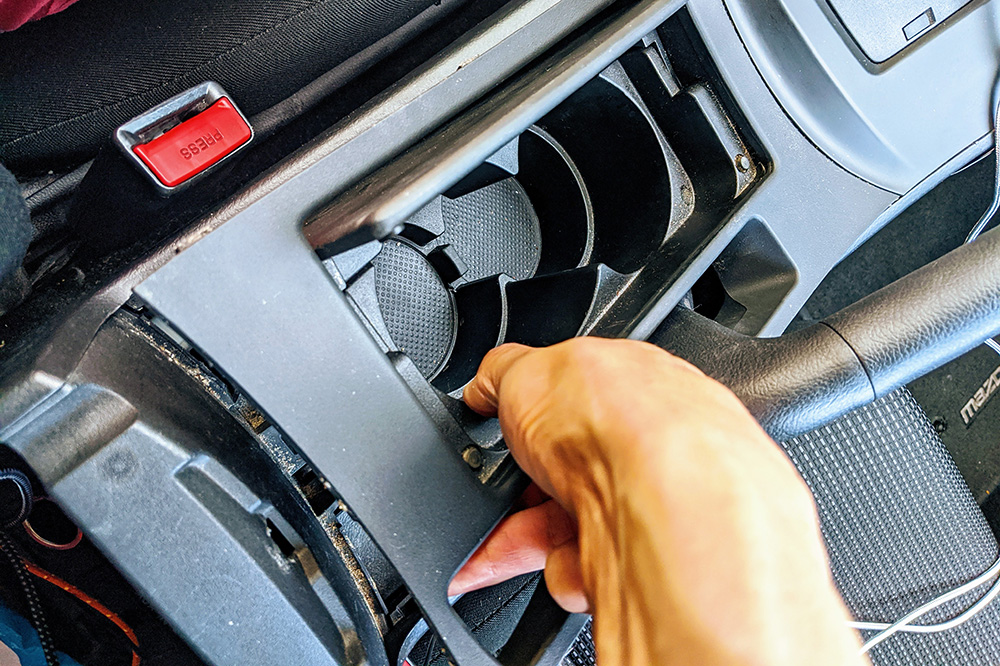
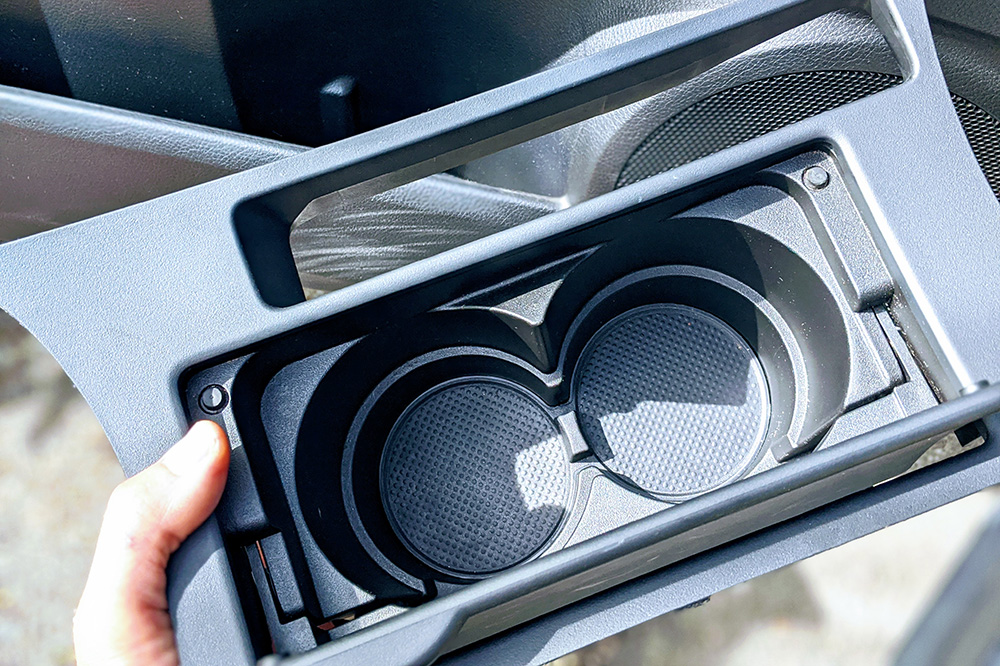
The cupholder panel, which also surrounds the hand brake, is held in place by a number of plastic tabs. Your mission is to find these tabs and unclip them without bloodying yourself.
-
Secure some Neosporin in case you engage in Mortal Kombat with the paneling.
-
Find the hidden tabs as shown in the following photos and pull in and upward to unclip them. Notice the missing skin on my middle finger.

-
This next tab is the worst. I pried with a small, flat head screwdriver. You may notice the small dents I made in the plastic.
-
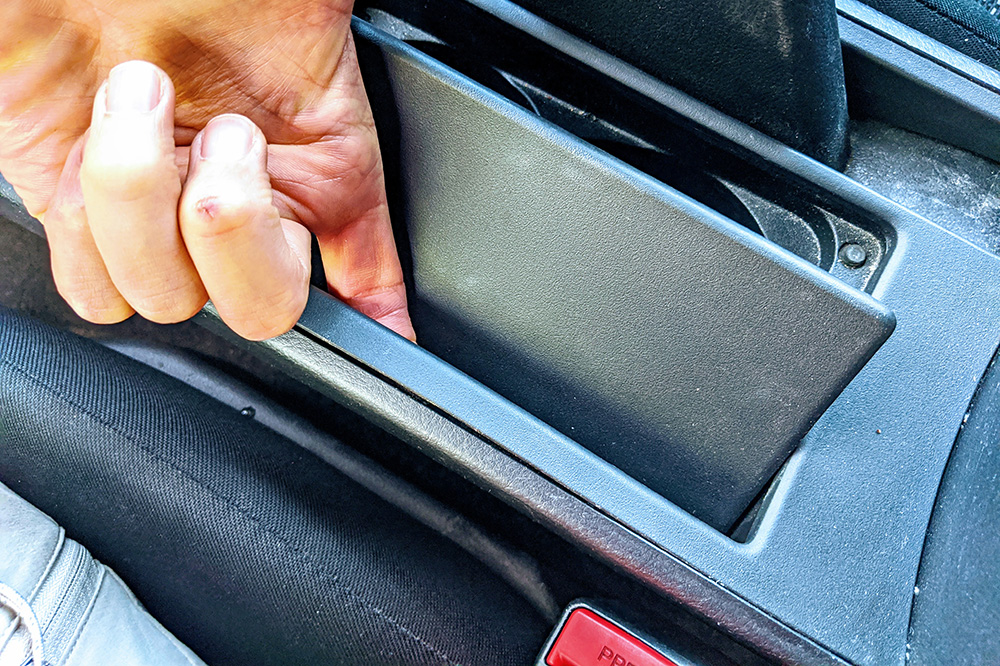
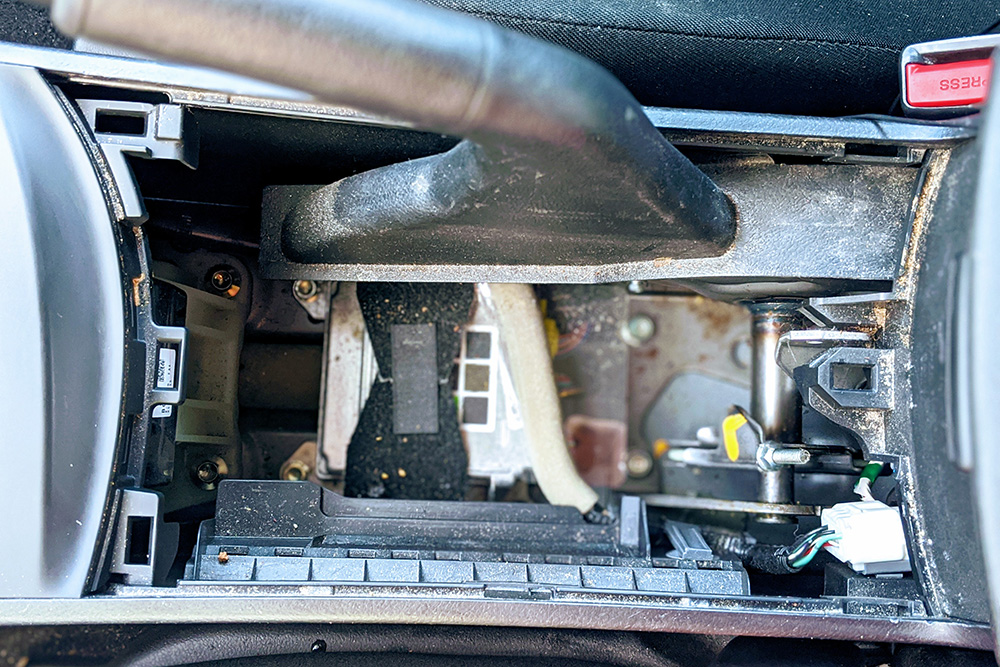
You should now be able to detach most of the cupholder tray as shown. If not, just yank around in random spots until the back portion comes free. The front of the tray is still secured by another set of tabs.
-
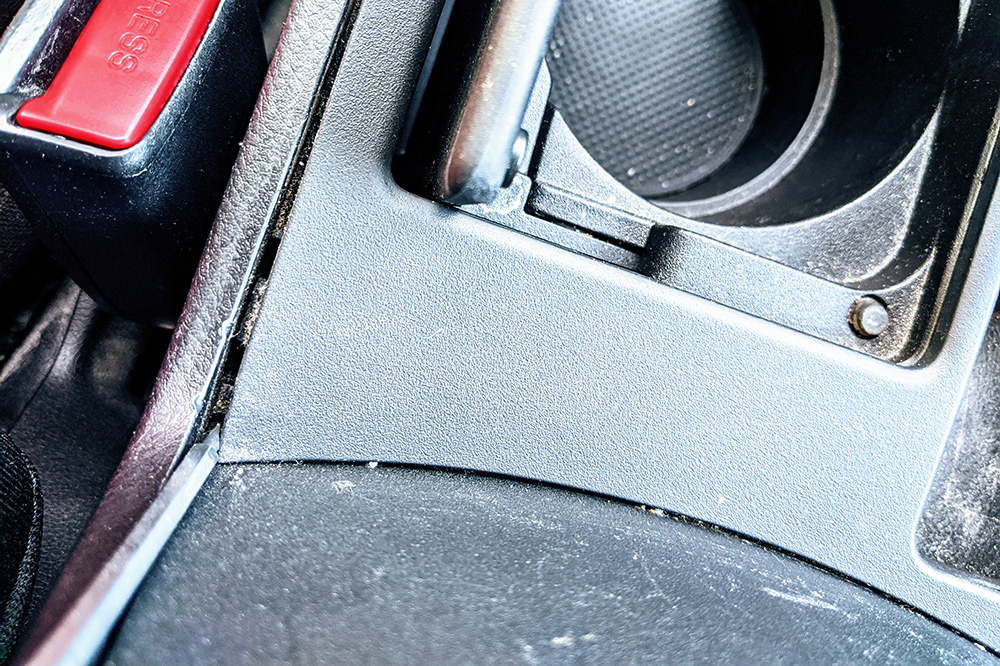
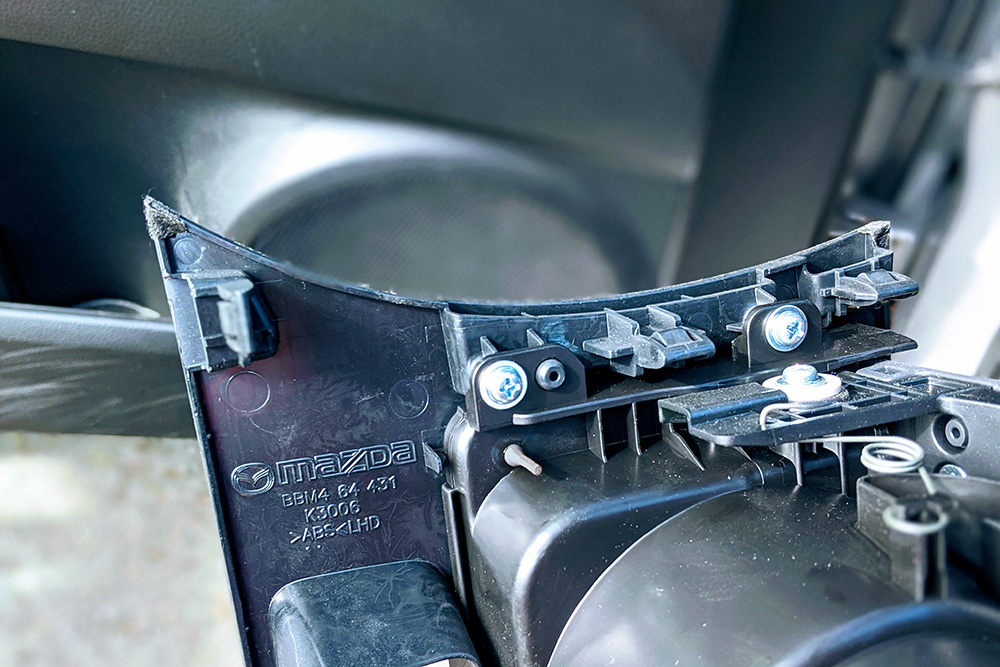
The panel’s liberation nears, but it’s no time to get cocky. Take note of the positions and orientations of the remaining tabs (see photo), and remove the panel however you can.
-
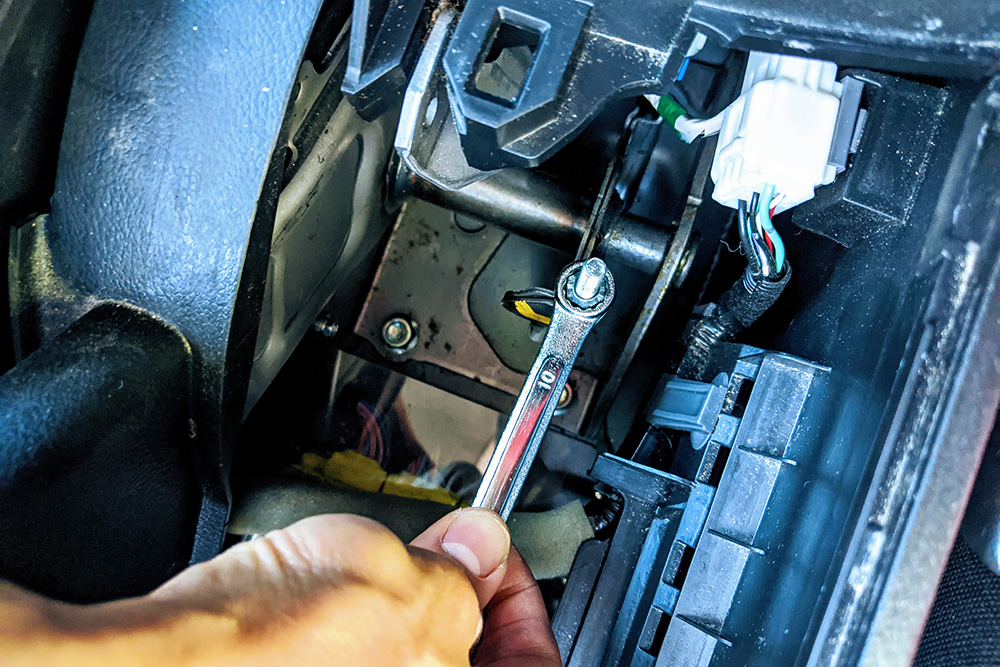
With the panel removed, you’ll see a 10mm nut threaded over a long bolt. Tightening the nut tightens the e-brake.
-
Don’t be a savage. Clean that Cheeto dust and dried blood off that cupholder before reinstalling it.
23 Apr 2020
- Vehicle: 2012 Mazda 3i, 2.0L, vin G
- Tools Used:
- 15mm box wrench
- 8mm box wrench
- Socket wrench with 10” extension (3” won’t be enough)
- 5/8” spark plug socket
- Parts Purchased:
100k+ miles, a rough idle, sputtering engine starts, and a negative fuel trim meant it was time bid adieu to the old plugs. I should have replaced them at the recommended 75k miles, but I was too busy not being busy.
Spark Plug Info
NGK replaced the ILTR5A-13G with ILTR5K13 (90607) for Ford/Lincoln/Mercury vehicles and LTR5BI-13 (90083) for Mazda vehicles.
NGK LTR5BI-13 Specs
- Torque Spec: 7.2 - 14.5 lb. ft. against aluminum
- Longevity: 100k miles
- Gap: Pregapped to 0.05”
Procedure
-
Wait for the engine to cool down unless you’re a firebender or don’t mind some sick burns.
-
Pop off the plastic engine cover. If you’ve never done this, just pull up from the back of the cover with your hands. Do not eat the cover.
-
Use a 15mm wrench to remove the two plastic engine cover holders.
-
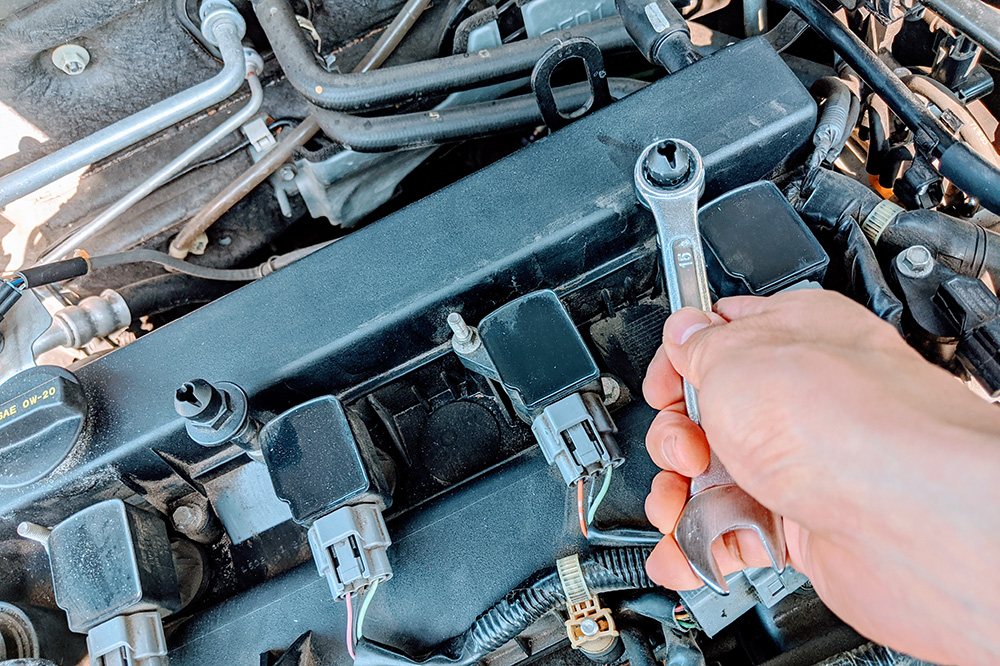
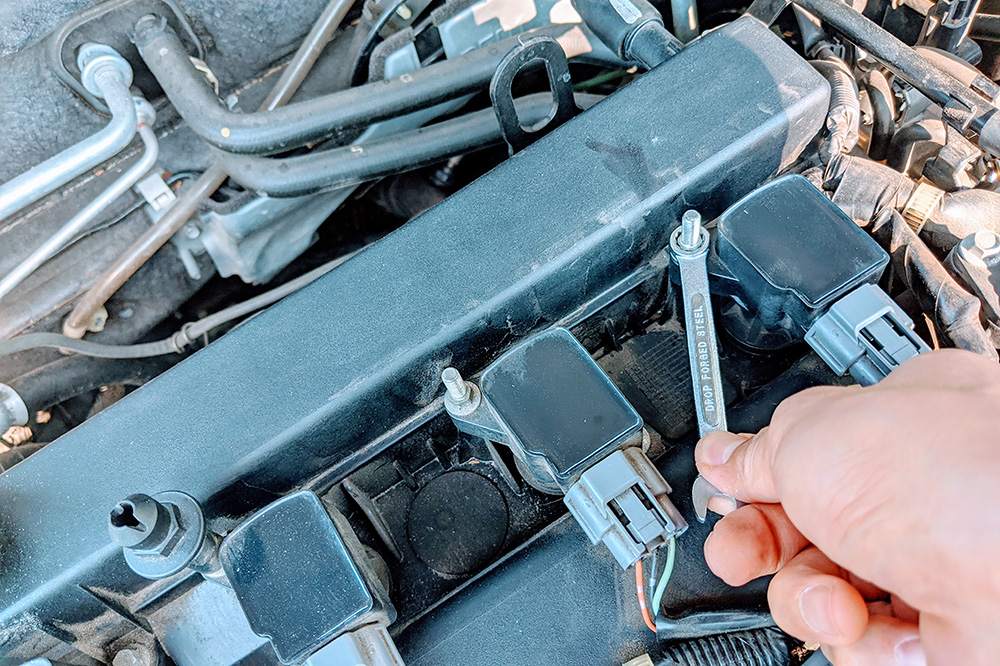
Disconnect the wire going to the first plug, and use a 8mm wrench to remove the screw holding the ignition coil in place.
-
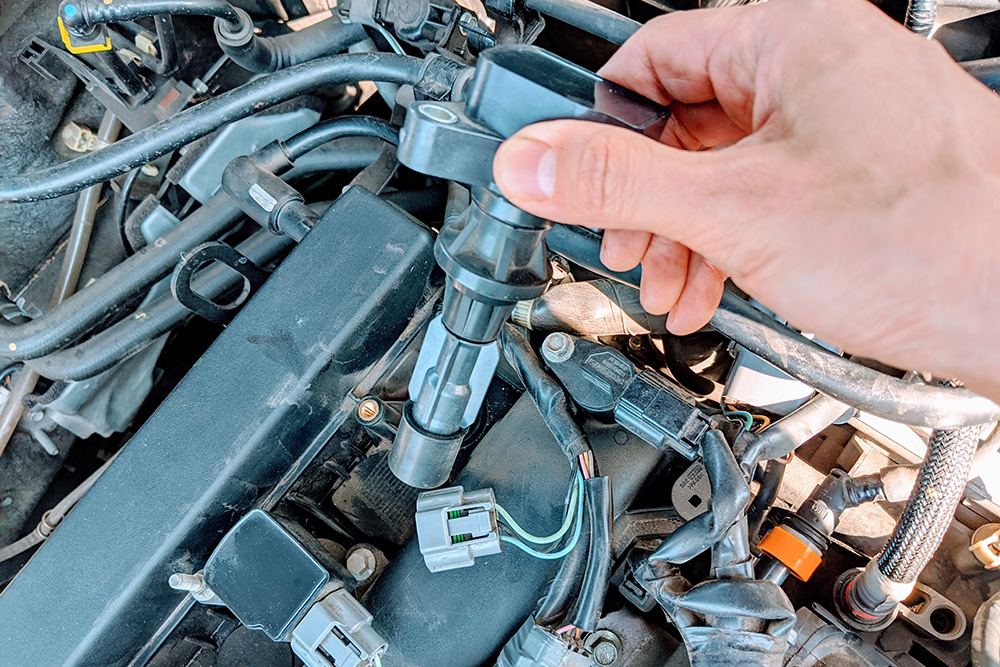
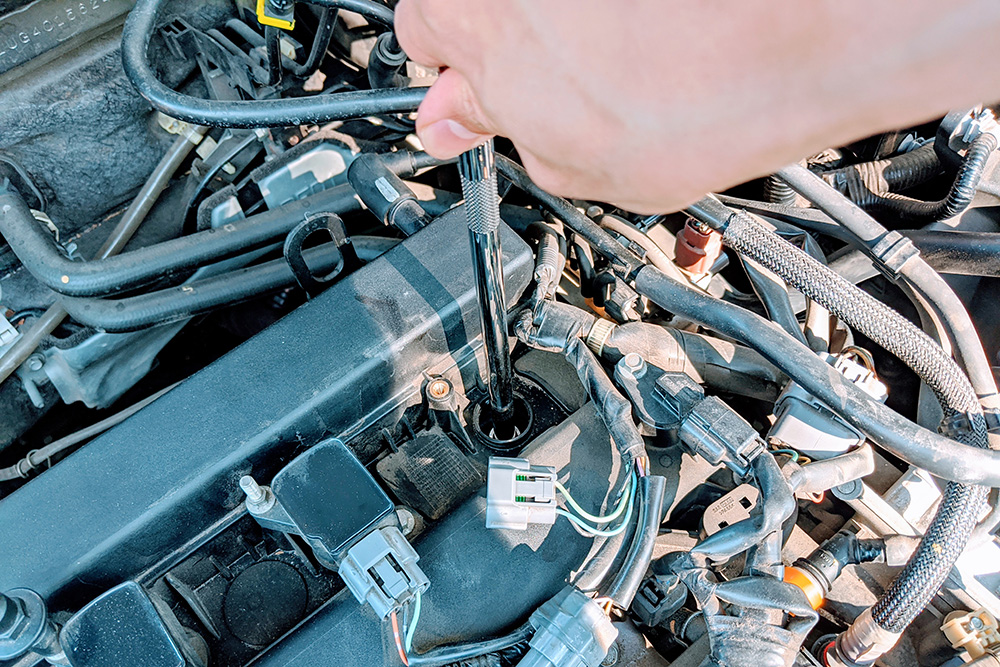
Gently remove the ignition coil (these are expensive!) and take care to prevent debris from falling into the spark plug hole unless you’re helping an annoying neighbor.
-
Remove the spark plug using a socket wrench with extension and spark plug socket. An over-torqued plug is stuff of nightmares, so if you have one, pray it doesn’t destroy the threads on the cylinder head.
-
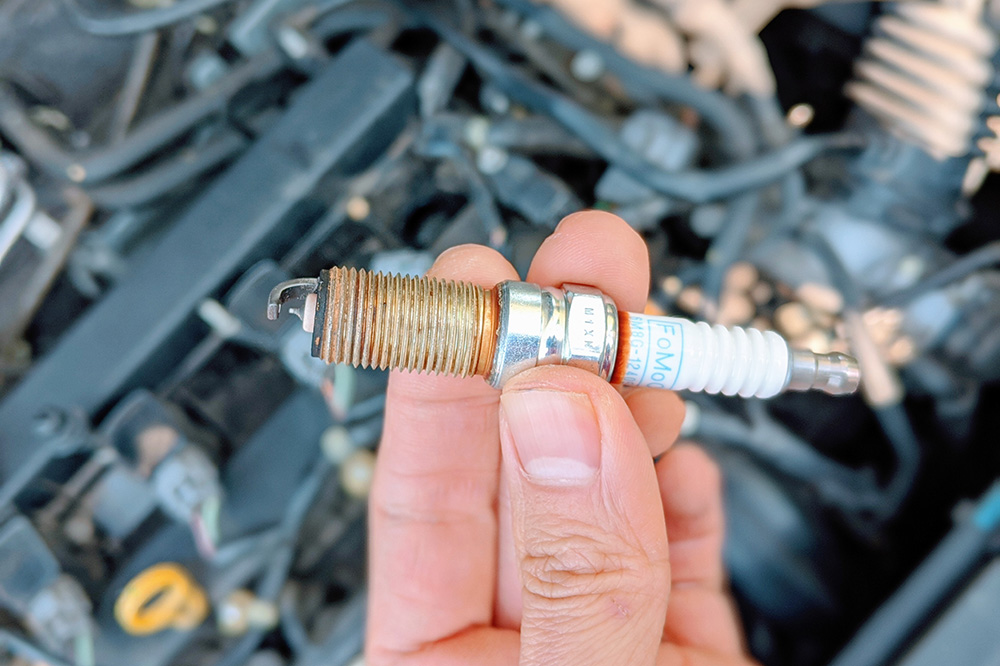
Nothing to do in this step except to check out this 100k+ miles spark plug.
-
Add a thin coating of di-electric grease to the ceramic portion of the new spark plug, and another thin layer to the inside of the rubber opening on the ignition coil. Tip: use a Q… tip. Be sure to not grease the spark plug electrode or the electrode contact inside the ignition coil. Di-electric grease is not non-conductive.
-
This one’s a freebie. According to NGK, their spark plug threads have a special coating that do not require any anti-seize. Don’t be a fool and over-torque your plugs because you anti-seized the crap out of them.
-
Another freebie. Don’t gap the spark plug. Iridium plugs are delicate, and plus, these are already pregapped to 0.05”. This is within the service manual’s spec of 0.049” - 0.053”.
- Screw the spark plug back into the cylinder head. Do NOT over-tighten. If you’re cool, tighten with a torque wrench to 7.2 to 14.5 foot pounds. If not, NGK’s own website says:
If a torque wrench is unavailable, finger tighten the spark plug, then use a plug wrench to tighten. 1/2-2/3 turn on plugs with a gasket. 1/12-1/8 turn on plugs with a tapered seat.
-
Screw the ignition coil back into place and reconnect the wire.
- Repeat for the other 3 plugs.
Results
- Reduced hesitance during start up
- Smoother idling
- Short-term and long-term fuel trims within healthy range
18 Apr 2020
- Vehicle: 2012 Mazda 3i, 2.0L, vin G
- Tools Used: Phillips screwdriver
- Parts Purchased: STP CAF1878P
Procedure
-
Procrastinate until you smell a foul odor coming from the vents. Or be proactive.
-
On the passenger side, pop off the small panel next to the floor mat with your mouth. Alternatively, use your hands.
-
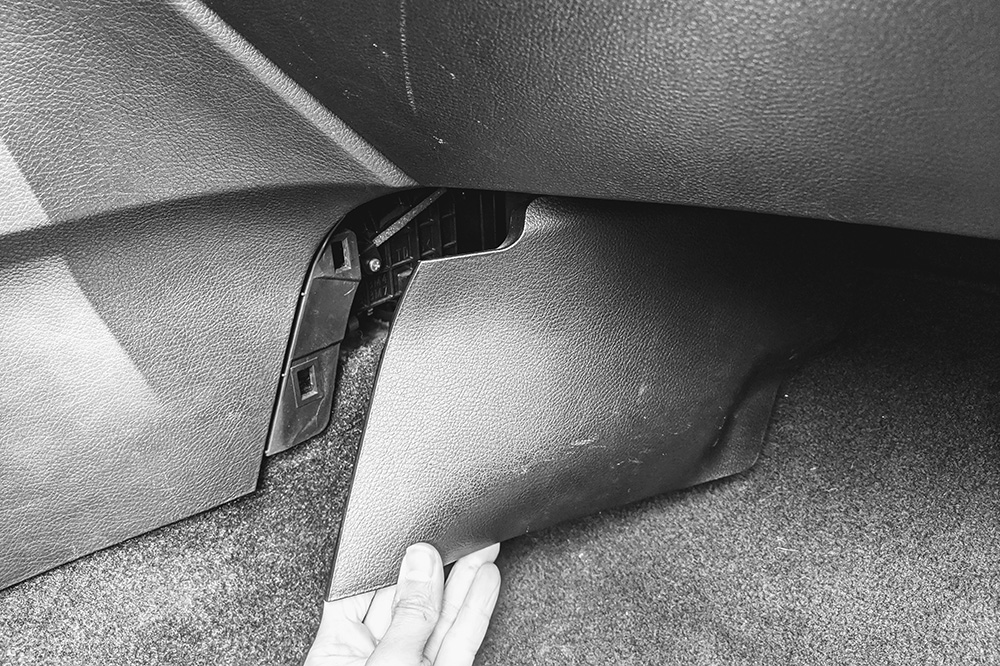
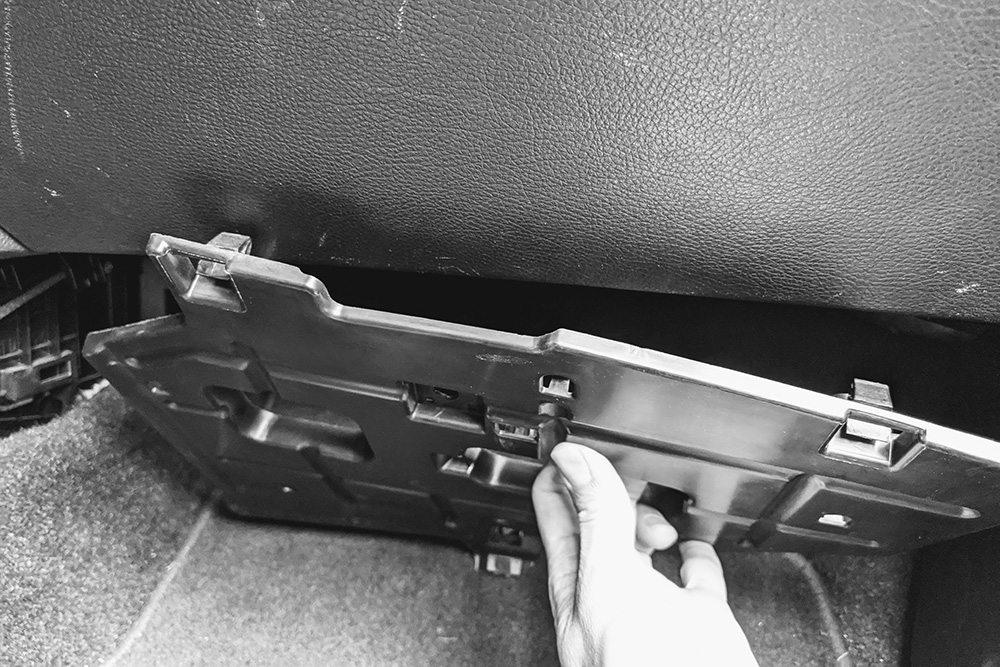
Pop off the panel underneath the glove box via the big-ass tabs seen on the left and right.
-
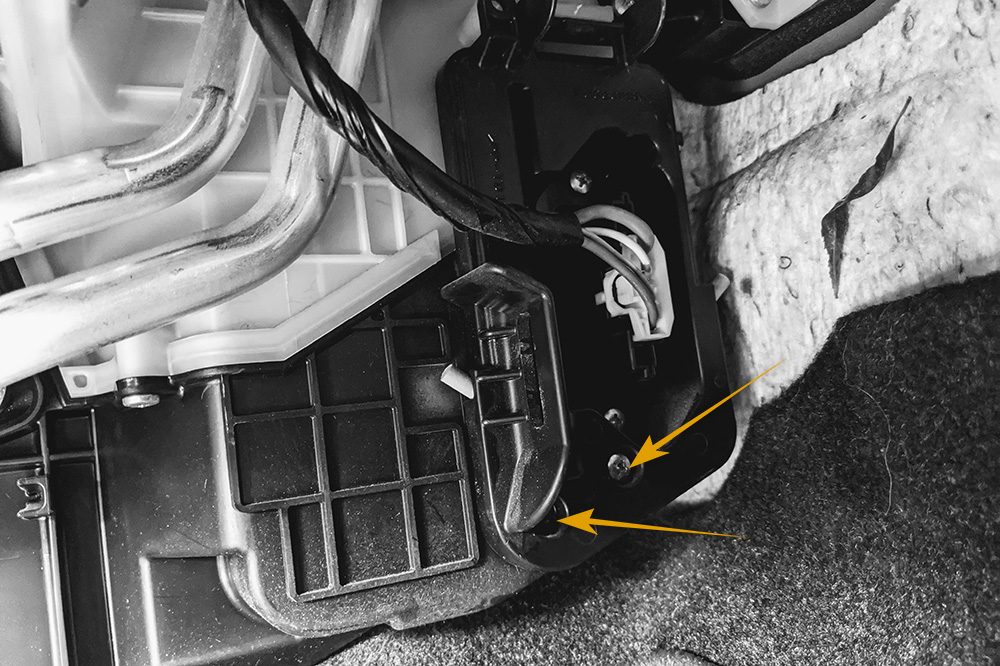
The blower motor resistor housing is now fully exposed. The resistor, cabin air filter, and a legion of dismembered bugs lurk within. Grab a Phillips and unscrew the two screws shown below. Pull the housing back to gain access to the cabin air filter. If you’re tall with a big head, prepare for a yoga session.
-
Disconnect the power cable going to the blower motor resistor. Not disconnecting the cable will require 3 arms or a high level of patience to install the new filter.
-
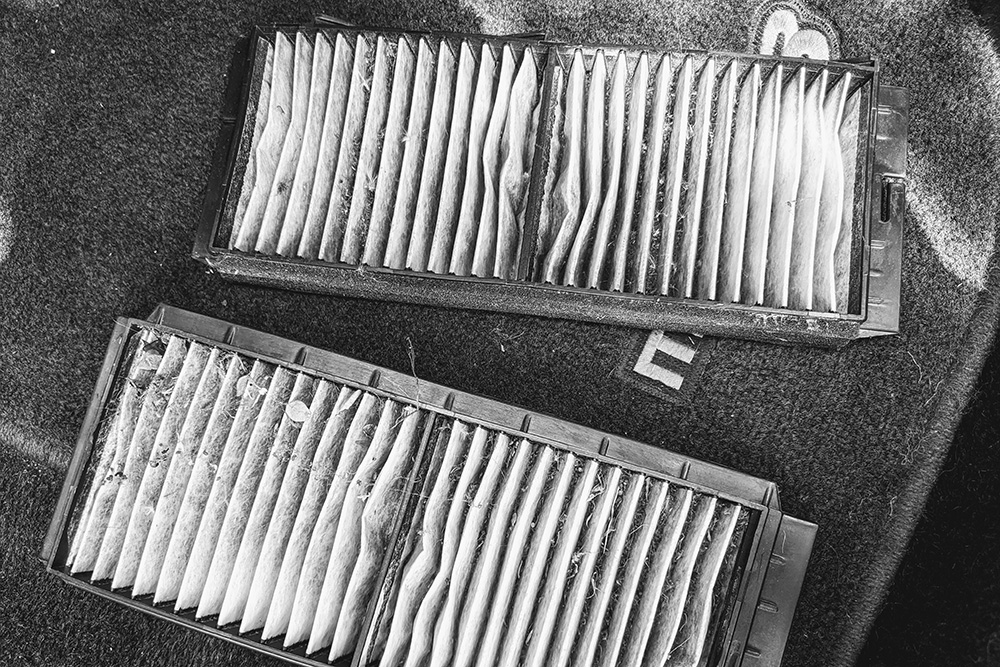
Once the blower motor resistor housing is removed, you have direct access to the cabin air filter itself. The filter comes in two stacked halves. Observe how they’re stacked when removing them. When inserting the new filter, the half with the foam goes in first. The foam should be on top, and the thicker tab should face out. Once in, push that first half upward so you can slide the second half through the same opening. Again, the thicker tab should face out. Make sure it all fits like a glove. Now, enjoy a photo of my filthy filter.
-
Put everything back from whence it came - especially the blower motor resistor (the card-looking thing). The air flowing past the cabin air filter cools the resistor.
P.S. If you’re wondering what the blower motor resistor is for, it helps control the different fan speeds. As you turn the fan dial to higher speeds, the resistor provides less and less resistance, thus allowing more current to flow through the blower motor. When the fan is at its max setting, the blower motor resistor is bypassed completely. So… if your fan only works at the highest settings, chances are you have a bad resistor.