Drive Belts and Tensioner Pulley Replacement
02 May 2020- Vehicle: 2012 Mazda 3i, 2.0L, vin G
- Tools Used:
- Car jack
- Jack stands
- Wheel chocks
- 1/2” drive socket wrench
- 1/2” drive torque wrench (for tightening wheel lugs)
- 21mm socket (for wheel lugs and turning the crankshaft)
- 3/8” drive socket wrench
- 14mm socket (for tensioner pulley)
- Phillips screwdriver (for splash guard)
- 10mm box wrench (for splash guard)
- Scissors (a pocket knife will work too)
- 8” zip ties
- Parts Purchased:
- A/C drive belt: Continental 4050264S
- Serpentine belt: Continental 4060514
- Tensioner pulley: Duralast Idler Pulley 231015
My Mazda had over 100k miles under its belt. Ba-dum, chshhsh. Despite a crack-free belt inspection, I decided to do a little preventative maintenance and replace the serpentine and a/c drive belts. And since the tensioner pulley had a few millimeters of play, it had to go too.
Layman’s Intro to Drive Belts
The prime objective of the internal combustion engine is to convert downward motion of the pistons (caused by explosions of air, fuel and spark) into rotational motion of the crankshaft. Drive belts (often alluded to as fan belts by old timers) are all connected to a crankshaft pulley. Their purpose is to help rotate other components. The serpentine belt is a type of drive belt that rotates multiple components like the alternator (providing your car with electric power and recharging your battery), water pump (which pumps coolant through the radiator and engine), a/c compressor, etc. Its winding disposition gives it its name. A special pulley known as the tensioner pulley keeps the belt tight, even as the belt stretches over time.
Procedure
-
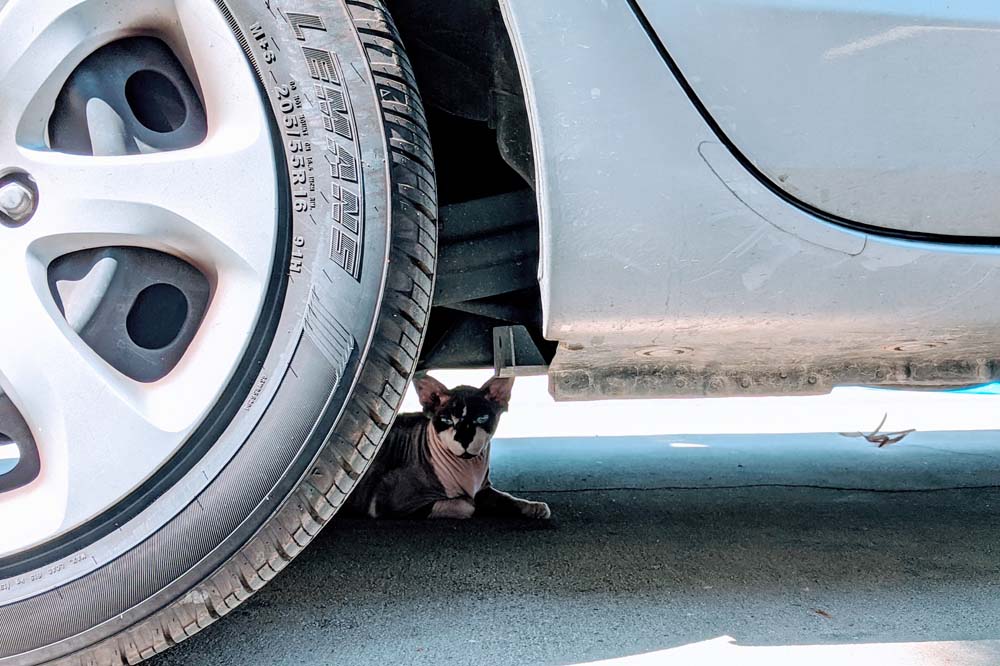
Use a treat to lure any beloved beings away from the vehicle. Boba works on me.
-
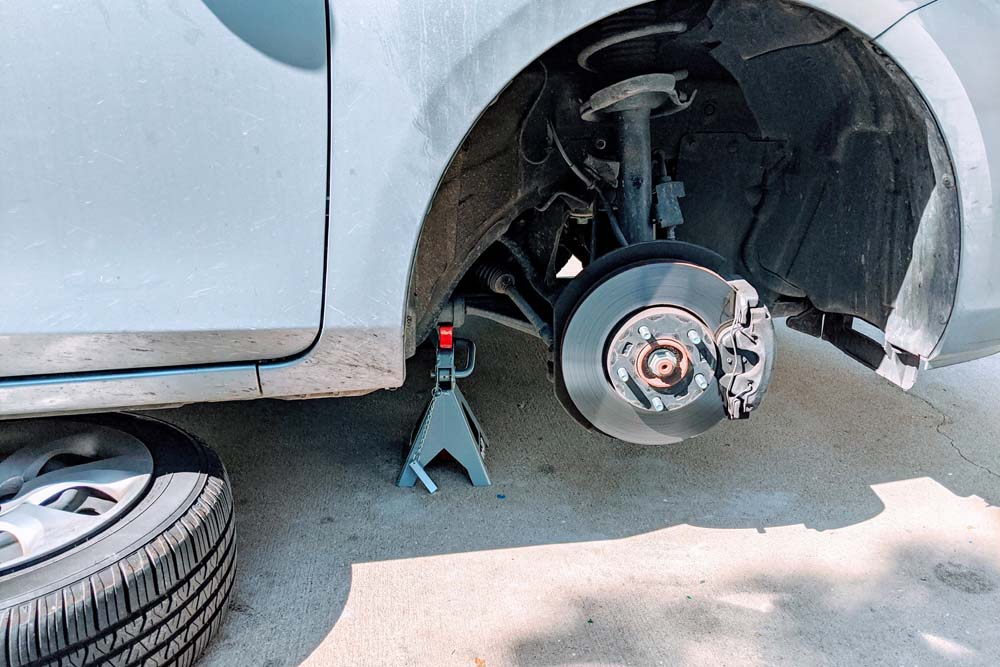
Raise the front of the vehicle onto jack stands. Don’t forget to first engage the e-brake and use wheel chocks on the rear tires. Remove the front right wheel and use it as a backup for the jack stands.
-
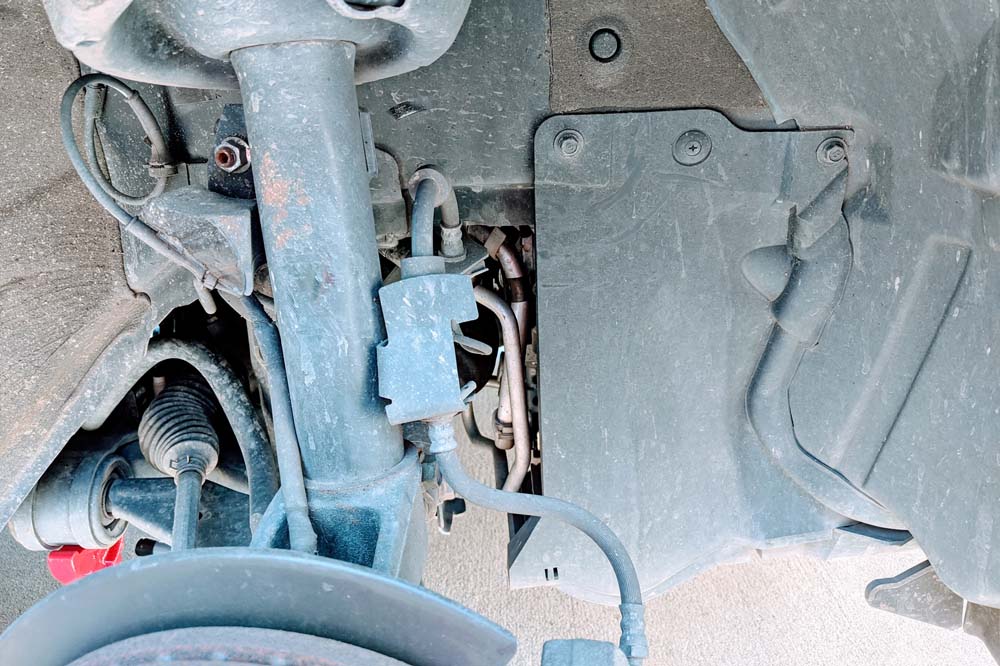
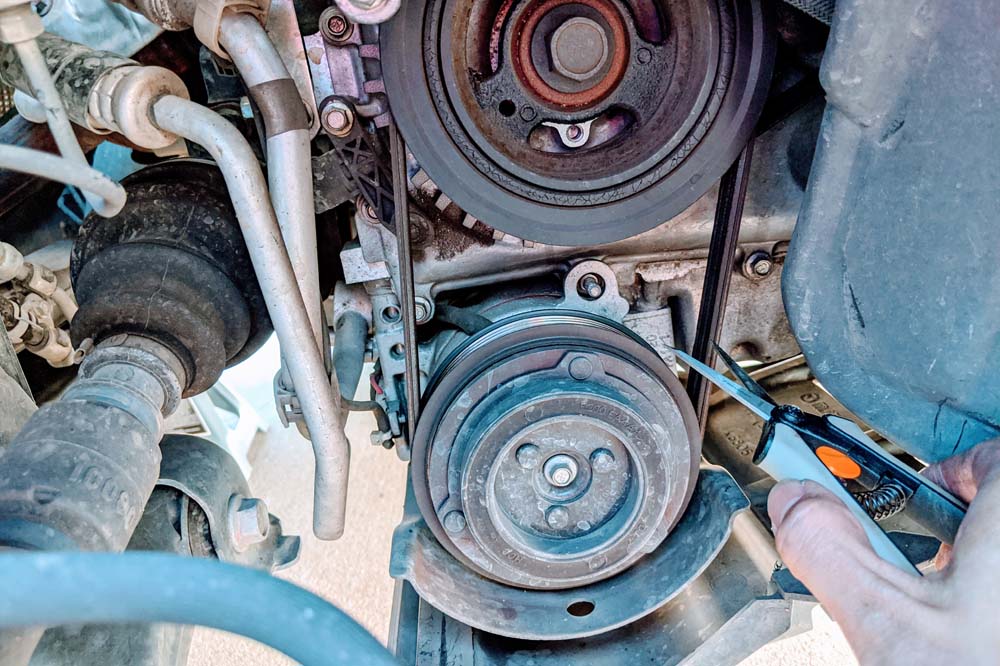
Remove the splash guard as seen on the right of the photo. This is fastened on top by two 10mm bolts and a screw as shown. The bottom is held in with two 10mm bolts.
-
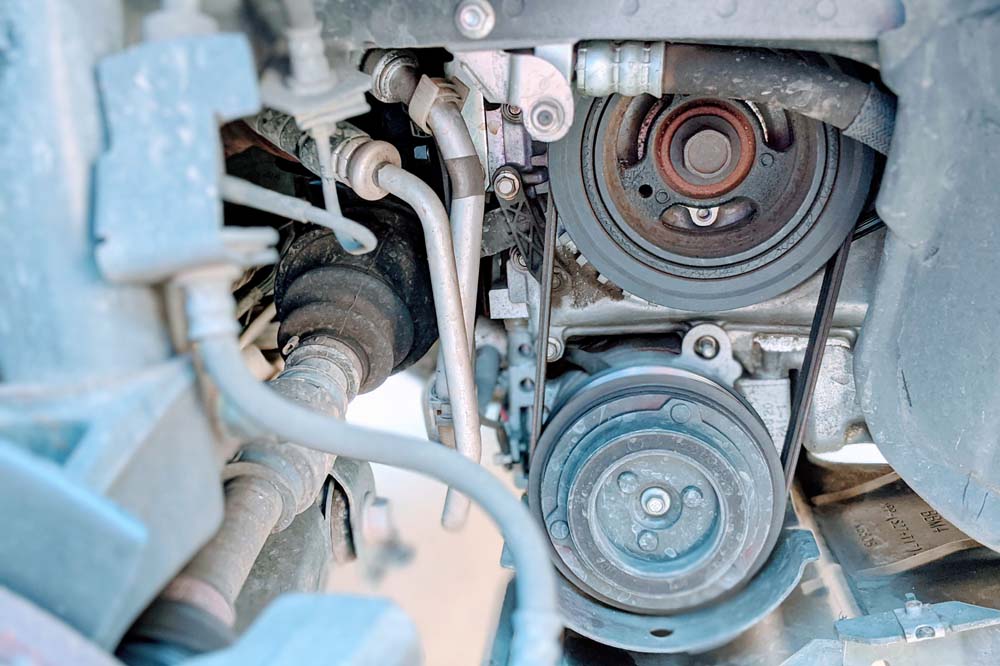
Removing the splash guard exposes the crankshaft pulley (top), a/c compressor pulley (bottom) and a/c drive belt. The a/c drive belt has no tensioner - it’s a stretch belt and a pain in the ass to install. The serpentine belt, more accessible from the engine bay, rides on a separate set of ribs on the crankshaft pulley behind the a/c belt. You cannot replace the serpentine belt without first removing the a/c stretch belt.
-
The only way to reasonably remove the a/c stretch belt is to slice it. If you quit after this, you can still drive around without air conditioning. You might even get better mileage without the friction of a second drive belt. What you won’t be getting is an erect set of nipples despite the scorching summer heat.
-
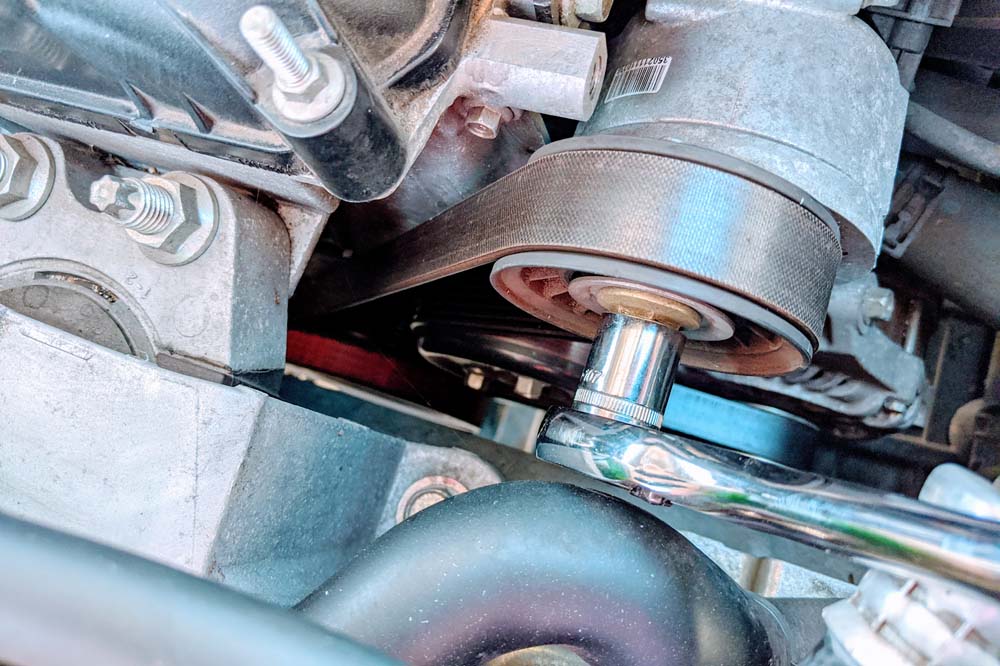
Up in the engine bay, take a mental snapshot of how the belt wraps around the different pulleys before removing it. In the photo from the bottom left, the belt comes from the crankshaft pulley up to the tensioner pulley, back down and left to the shiny water pump pulley, down and right to the alternator pulley, and finally back to the crankshaft pulley.
-
Use a socket wrench with 14mm socket to push (towards the rear of the vehicle) and loosen the tensioner pulley so you can remove the serpentine belt.
-
Before installing the new serpentine belt, replace the tensioner pulley. It’s important to know that the bolt for this pulley loosens clockwise and tightens counter-clockwise. Unscrew the bolt and washer and install the new pulley.
-
Install the new serpentine belt, and take care to seat the ribs properly. I found it easiest to fit the belt over the tensioner pulley last.
-
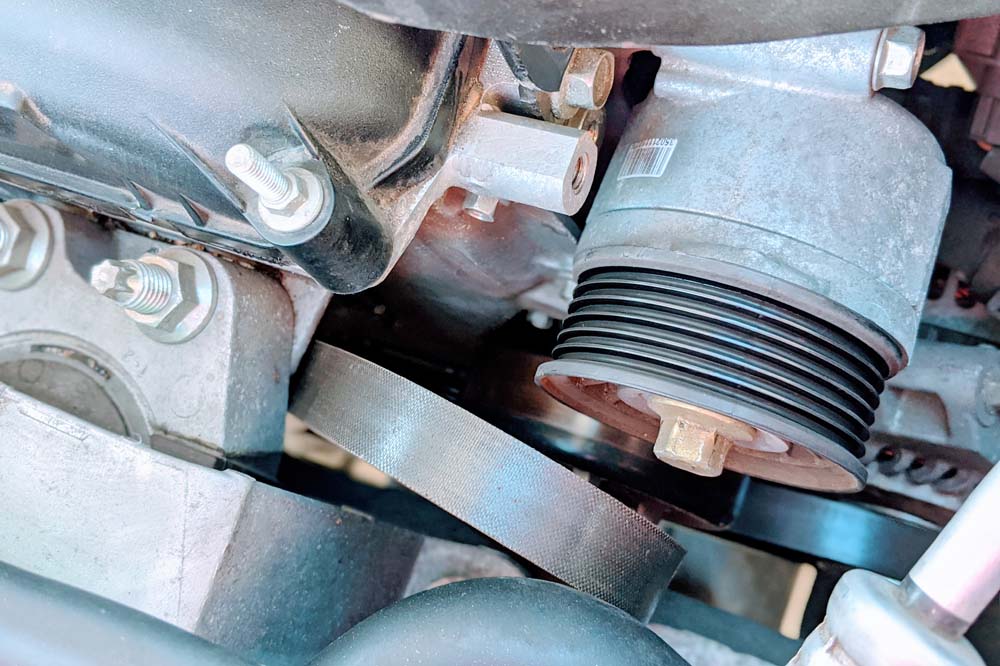
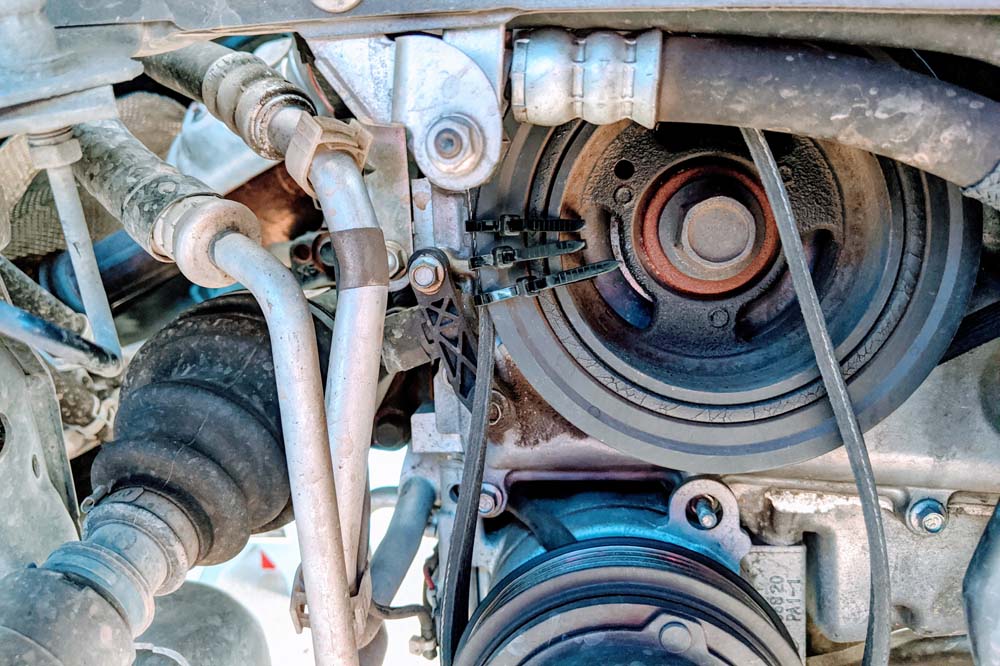
If you’ve made it this far, know that the hardest part lies ahead. Mazda makes a special tool to install the a/c stretch belt, but the consensus is that using a simple zip tie hack is far easier than using the tool itself. Wrap the belt around the a/c compressor, and zip tie the top left to the crankshaft pulley as shown.
-
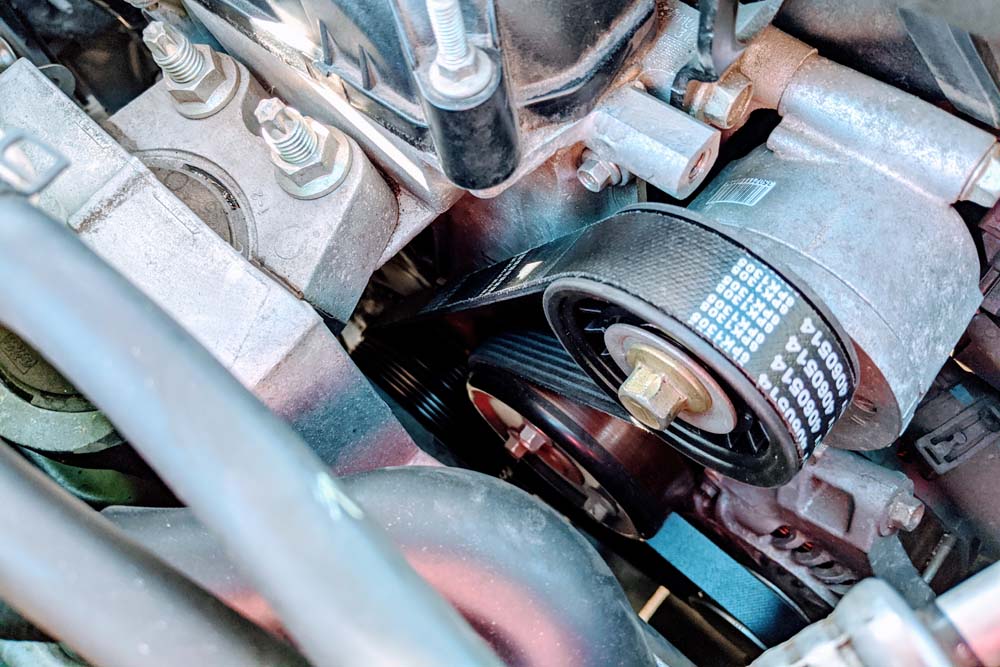
Now, use a socket wrench with 21mm socket to rotate the crankshaft clockwise from the crankshaft bolt at the center of the pulley. For some engines, you shouldn’t rotate the crankshaft opposite of its operating direction, so we’ll just adhere to that principle here. While rotating, guide the belt towards proper seating. The zip ties may pop and break, and that is completely normal. If all of them break before the belt is seated, you’ll have to start over. Once you get the a/c belt on, remove the zip ties, and give the crankshaft a couple more rotations to ensure the belt is installed properly.
-
Start your car and make sure it doesn’t explode.
Results
Everything felt the same, and the air conditioning still works. This is good. However, my gas mileage went down by roughly two miles per gallon. I wonder if the new stretch belt is adding a lot more friction to the crankshaft. Perhaps it just needs time to stretch out a bit. Time will tell.